
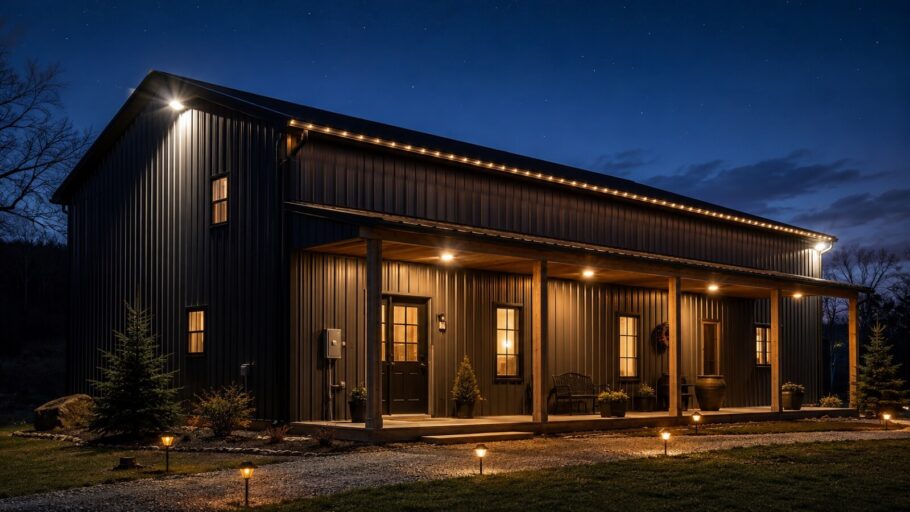
The barndominium lifestyle represents a fusion of rugged utility and refined living, but nothing undermines that marriage faster than poor exterior lighting. Too many owners treat outdoor illumination as an afterthought, resulting in a building that feels more like a dark aircraft hangar than a home. The secret lies not in the fixtures themselves, but in the rough-in phase—the invisible network of wiring and boxes that determines what is possible long after the metal siding goes up.
A successful exterior lighting plan accomplishes three distinct objectives simultaneously: creating mood, ensuring safety, and providing the infrastructure for seasonal displays. Achieving all three requires thinking beyond the standard porch light and actually mapping out the property’s needs before the drywall goes up.
Strategic Planning for Three Distinct Functions
Lighting serves multiple masters, and each demands consideration during the rough-in stage. Ambiance requires dimmable circuits and strategic placement. Security demands motion sensors and coverage overlaps. Holiday lighting necessitates accessible outlets and the capacity to handle temporary loads without tripping breakers.
The mistake many make is treating these as separate systems when they should function as an integrated whole. A well-designed exterior setup allows a single circuit to power pathway lighting for daily use while providing a junction point for festive displays come December. The key is installing the right infrastructure now rather than wrestling with extension cords later.
Ambiance Considerations
Creating atmosphere around a barndominium involves layering light at different heights and intensities. Think about how the space will be used during evening hours. Will there be seating areas requiring soft illumination? Pathways that need gentle guidance? Architectural features worth highlighting?
Proper rough-in for ambiance means installing separate switching for different zones. A single switch controlling everything defeats the purpose of layered lighting. Consider three-way switches for areas with multiple entry points. Run neutral wires to every switch box to accommodate smart dimmers and timers down the road.
Security Requirements
Security lighting serves a different purpose entirely and requires its own approach. Motion sensors need clear fields of view without obstruction from beams or overhangs. The rough-in phase is the time to position boxes for optimal sensor placement, typically eight to ten feet above grade.
Consider overlapping coverage zones so no dark corners remain. Entry points deserve particular attention, but do not neglect side yards and equipment storage areas. The ability to add cameras later means running low-voltage wiring alongside standard electrical during the rough-in stage, even if the cameras themselves come later.
Holiday Light Infrastructure
This often-overlooked aspect of planning can save tremendous frustration. Holiday lights require accessible outlets at strategic points—under eaves, on porch ceilings, and along rooflines. Installing a switched outlet near the peak of a gable end makes hanging star decorations or string lights remarkably simpler.
The rough-in should include at least one dedicated circuit for exterior seasonal use. Nothing ruins holiday cheer like tripping a breaker when the inflatable Santa and the icicle lights compete for power with the garage door opener.
Understanding Outlet Placement and Types
Outlets form the backbone of any exterior electrical plan, and their placement requires careful thought about future needs. Standard code requirements dictate GFCI protection for all exterior receptacles, but going beyond minimum requirements transforms the property’s functionality.
Consider placing outlets at the following locations:
- Under each eve or soffit for holiday lighting and permanent architectural lighting
- Near outdoor seating areas for charging devices or powering small appliances
- At the base of trees or large planters for landscape lighting transformers
- On each side of the garage door for maintenance equipment
- Near the main entry points for convenience and temporary lighting
- At the service panel location for maintenance access
Weatherproof while-in-use covers are non-negotiable in any exterior application. These covers allow plugs to remain connected even when the outlet is in use, preventing moisture intrusion. The rough-in phase should account for the extra depth these covers require.
The Technical Side of Rough-Ins
The mechanical aspects of exterior rough-ins demand attention to detail that interior work does not always require. Exterior boxes must be weatherproof and properly sealed against the building envelope. Every penetration through the metal siding needs careful flashing and sealing to prevent moisture intrusion.
Wire selection matters enormously in exterior applications. UF cable or THHN in conduit provides the durability needed for outdoor exposure. Running wires through conduit offers additional protection and simplifies future upgrades or replacements.
Load Calculations and Circuit Planning
Understanding electrical loads prevents unpleasant surprises. Exterior lighting circuits typically handle lower amperage, but outlets intended for tools or equipment require dedicated circuits. A single 20-amp circuit can handle considerable holiday lighting, but adding electric grills, hot tubs, or outdoor heaters changes the calculation completely.
Running extra circuits during the rough-in phase costs relatively little compared to the expense of adding them later. Consider installing a subpanel in the garage or shop area to simplify future additions and reduce voltage drop over long runs.
Smart Home Integration
The modern barndominium benefits from smart controls that were unimaginable just a decade ago. Rough-in planning should accommodate smart switches, dimmers, and sensors even if the budget does not allow for immediate installation.
Running neutral wires to every switch location remains essential for most smart devices. Consider installing deeper switch boxes to accommodate the larger physical size of smart switches. Low-voltage wiring for occupancy sensors and photocells should be planned during the rough-in stage rather than retrofitted later.
Common Pitfalls and How to Avoid Them
Even experienced builders make mistakes with exterior rough-ins. Understanding the most common issues helps avoid costly corrections later.
Insufficient Outlets remains the number one complaint among barndominium owners. The rule of thumb suggests installing twice as many exterior outlets as initially seems necessary. Outlets that seem redundant during construction become essential once furniture, decorations, and equipment fill the space.
Poor Placement creates frustration when outlets end up behind furniture or in locations that require extension cords. Mock up the space with tape or temporary markers during the rough-in phase to verify that outlet positions make sense with the planned layout.
Inadequate Switching leaves owners unable to control lighting zones independently. Every exterior lighting zone deserves its own switch or at least the capability for separate control through smart home systems.
Ignoring Future Needs represents perhaps the most significant oversight. Running empty conduit from the panel to strategic locations provides future flexibility at minimal cost. Conduit to the roofline, to outbuildings, and to the property perimeter allows for cameras, speakers, and other future technology.
Forgetting about Transformers for landscape lighting creates problems for owners who want low-voltage systems. These transformers require outlets and often benefit from dedicated circuits to prevent flickering when other loads cycle on and off.
The Holiday Light Advantage
Proper planning for holiday displays transforms what could be a frustrating annual chore into a simple plug-and-play experience. Installing permanently mounted outlet boxes at roofline locations eliminates the need for precarious ladder work each season.
Consider installing a switched receptacle near the peak of the main structure, controlled from inside the home. This allows turning displays on and off without going outside in inclement weather. Installing multiple circuits for holiday lighting allows dividing displays into zones that can be controlled separately.
The rough-in phase also provides the opportunity to install mounting points for permanent holiday light tracks or clips. These small additions make seasonal decorating substantially safer and more enjoyable.
Final Walkthrough Considerations
Before closing up walls, conducting a thorough review of the exterior rough-in plan prevents oversights. Walk the property at night with temporary lighting to understand how shadows fall and where additional illumination might prove beneficial.
Document every wire run and box location with photographs and measurements. This documentation proves invaluable when adding fixtures or troubleshooting issues years later. Label all circuits clearly at the panel and at junction boxes to simplify future work.
The investment in comprehensive exterior rough-ins pays dividends in convenience, safety, and enjoyment for the entire time the barndominium stands. Proper planning transforms a basic structure into a truly functional home that shines equally bright during everyday living and special occasions.
With careful attention to ambiance, security, and seasonal needs during the rough-in phase, the barndominium exterior becomes an extension of the living space rather than a forgotten afterthought. The result welcomes residents home, deters unwanted visitors, and provides the infrastructure for celebrating life’s moments with brilliant, beautiful light.