There is a quiet truth in the barndominium world that separates smooth builds from stalled ones. Inspectors need proof. Not promises, not verbal assurances, but clear, organized documentation showing that every nail, wire, and pipe meets code. The difference between a passing inspection and a failed one often comes down to how well the builder documented the work before the inspector ever showed up.
Barndominiums occupy a strange middle ground between agricultural structures and residential homes. This hybrid nature makes inspections more intense, not less. Many local code officials still see a metal building and assume it belongs in a field with livestock. Convincing them otherwise requires a documentation strategy that leaves no room for doubt.
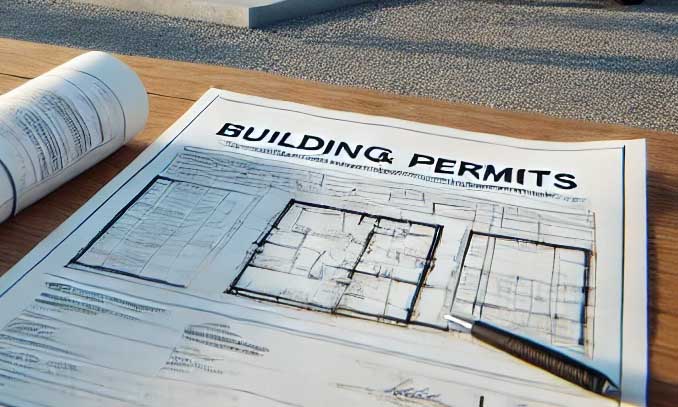
Why Inspectors Actually Want More Paperwork
Most people think inspectors hate paperwork. The opposite is true. A well-documented build tells the inspector exactly what happened behind walls and under slabs. That information lets them move faster and ask fewer questions. When an inspector walks onto a barndominium site and sees organized records, they relax. They know the builder takes codes seriously.
Poor documentation triggers deeper digging. Inspectors start pulling covers, requesting extra tests, and calling for re-inspections. Every missing record becomes a red flag. Every blurry photo raises suspicion. The builder ends up wasting time explaining things that should have been obvious from the start.
Documentation serves as a conversation starter. It shows the inspector what to look for and where to find critical components. For barndominium builds especially, where post-frame construction and steel framing differ from conventional stick-built homes, clear records help inspectors apply the right standards to the right details.
Starting Before Ground Breaks
Documentation begins at the permit counter. The initial permit application package sets the tone. This includes site plans drawn to scale, engineered foundation calculations, truss or rafter specifications, and any variance approvals. Many barndominium builders skip the geotechnical soil report, assuming post-frame foundations need less testing. That assumption often fails inspections. A soil bearing capacity test, properly documented and stamped, answers questions about frost depth and slab support before the first hole opens.
Copies of approved plans need to live on site in a weatherproof container. Not digital copies on a phone, but actual printed sheets with the stamp of approval. Inspectors want to see those stamps during framing and final inspections. Digital versions sometimes get accepted, but paper never runs out of battery.
Engineering letters for unconventional details deserve special attention. Think about mezzanine floors, overhead crane rails, or loft additions in the barndominium. Every engineered component needs its own documentation trail including load calculations, fastening schedules, and the engineer’s seal. Trying to produce those letters after the fact almost always delays the inspection.
The Daily Log That Saves Headaches
A construction log sounds old-fashioned. It works anyway. A simple notebook or bound ledger kept on site records every day’s activities, trades on site, materials delivered, and inspections passed or failed. This log becomes evidence of sequence. When an inspector asks whether the vapor barrier went down before the rebar, the log provides an answer from the actual date of installation.
Entries need specific details. Instead of writing “ran electrical,” the log should read “installed 12-2 NM cable for kitchen outlets, three circuits, staples every 36 inches.” Instead of “poured slab,” note “concrete mix 3500 PSI, fiber reinforced, six mil vapor barrier below, rebar on chairs at 18 inch spacing.” Those specifics match exactly what inspectors check.
Trades should sign or initial the log when they complete their portions. A plumber’s signature on a pressure test entry carries more weight than a note written by someone else. Same for electricians performing continuity tests or HVAC technicians recording refrigerant pressures. Multiple signatures create accountability across the entire build.
Photographic Evidence That Speaks Volumes
A picture might be worth a thousand words, but a poorly framed photo gets an inspector’s eyes rolling. Useful construction photos follow a consistent format. Each image needs a scale reference. A tape measure, a ruler, or even a known object like a quarter shows dimensions. Each photo needs context. A wide shot of the whole wall, then a medium shot of the area in question, then a close-up of the specific detail. Three photos per critical component, minimum.
Time stamps matter more than most builders realize. Camera metadata helps, but paper labels in the photo work better. A simple whiteboard or label maker showing the date, location, and inspection phase eliminates any argument about when the photo was taken. Some jurisdictions require embedded timestamps. Check local rules before relying purely on metadata.
What gets photographed? Everything that will become invisible after the next construction phase. Foundation reinforcing steel before the concrete pour. Plumbing rough-ins before backfill. Electrical boxes and conduit runs before insulation. Wall cavity insulation before drywall. Vapor barriers and air sealing details before interior finishes. Under-slab drainage and radon mitigation systems before concrete covers them up.
For barndominium specific features, photograph the transition between the steel frame and wood framing. Show how thermal breaks get installed at purlins and girts. Document the attachment of interior walls to the post-frame structure. These hybrid connections often confuse inspectors, but clear photos from the rough stage answer questions without anyone tearing into finished walls.
Material Documentation Beyond Receipts
Receipts prove purchase but not installation. Material documentation needs to link the product to its approved use. Keep cut sheets, specification manuals, and listing labels for every major component. The water heater’s energy guide, the HVAC unit’s AHRI certificate, the windows’ NFRC ratings. These documents show compliance with energy codes and mechanical standards.
Lumber grading stamps deserve special mention. Every piece of structural lumber in a barndominium carries a stamp indicating grade, species, and moisture content. Photographing a representative sample of stamps from each delivery provides evidence that the lumber meets code requirements. For engineered wood products like LVLs or glulams, keep the manufacturer’s installation instructions on file. Inspectors frequently check fastener spacing and bearing lengths for these products.
Electrical components need UL or ETL listings. A box full of unmarked outlets or unbranded breakers will fail inspection immediately. Keep the packaging or a photo of the listing mark for every electrical device installed. The same applies to plumbing fixtures. Low-flow certifications matter for toilets, showerheads, and faucets. Those documents prove compliance with water efficiency standards.
Third-Party Testing Reports
Some inspections require independent verification. Soil compaction tests, concrete cylinder breaks, weld inspections, and pressure tests all need third-party documentation. These reports carry more authority than anything the builder can produce alone. Schedule these tests in advance and keep the signed reports with the rest of the documentation.
For barndominium builds on rural land, septic system testing demands thorough documentation. Percolation tests, soil morphology evaluations, and final as-built drawings all become part of the health department inspection package. Missing any one of these documents delays the certificate of occupancy until the test gets redone, which can take weeks.
Structural welding on steel barndominium frames often requires inspection by a certified welding inspector. The resulting report, including photos of each weld type and location, proves that connections meet structural codes. Without this report, an inspector has no way to verify hidden welds inside columns or at critical beam connections.
Organizing for Instant Access
A pile of documents helps nobody. Organization determines whether the documentation actually gets used. Two systems work well simultaneously. A physical job site binder with tabbed sections for permits, plans, engineering, material specs, testing reports, inspection logs, and photo printouts. Plus a digital backup stored in the cloud with the same folder structure.
The binder should live in a visible location on site. Every subcontractor needs to know where it stays and how to add their documentation. Label each tab clearly. Update it weekly. Remove outdated versions of documents immediately to avoid confusion.
Digital organization follows the same logic. Scan every paper document the day it arrives. Name files consistently with date, trade, and description. “2025-01-15_Plumbing_PressureTest_80psi.jpg” works better than “IMG_4527.jpg.” Cloud storage allows access from anywhere, which matters when an inspector requests a document during a phone conversation before arriving on site.
Many building departments now accept digital photo submissions for certain inspections. Being able to pull up organized folders and email the exact photos requested within minutes builds goodwill with the inspection office. That goodwill translates into faster scheduling and more reasonable interpretations of borderline code issues.
Pre-Inspection Self Checks
Before calling for any inspection, run through the documentation checklist for that phase. For foundation inspection, confirm the soil report, rebar placement photos, footing depth measurements, and concrete mix design are all in the binder. For framing inspection, gather lumber stamps, fastener schedules, sheathing nailing patterns, and bracing details. For insulation inspection, have R-value certifications, air barrier photos, and vapor retarder installation records ready.
This pre-inspection review catches missing documentation before the inspector does. It also builds the habit of documenting continuously rather than scrambling at the end of each phase. The fifteen minutes spent reviewing before placing the inspection call saves hours of rework after a failed inspection.
Inspectors appreciate when the documentation gets handed to them without asking. A simple statement like “the foundation photos and soil report are tabbed in the binder” sets a cooperative tone. Hiding documents until requested looks suspicious. Transparency builds trust.
Common Documentation Pitfalls
Missing underground photos tops the list of failures. Once concrete covers a footer or backfill covers a drain line, those details disappear forever. Barndominium builds with post-frame construction bury critical connections below grade. No photos of those connections during installation means no way to prove they ever existed.
Blurry, dark, or poorly framed photos waste everyone’s time. A photo of a rebar grid from twenty feet away shows nothing useful. Getting close enough to see tie spacing and lap splices matters. Using a camera flash in dark crawlspaces matters. Steadying the camera against a solid surface matters. Grainy photos get rejected as insufficient evidence.
No date stamps create ambiguity. Even honest builders face questions about when a photo was taken. A date on the image or a date in the filename eliminates that ambiguity. Some builders use a small dry erase board in each photo showing the date and location.
Lost material receipts cause problems for tax purposes and inspections. But more critically, missing UL labels or missing MSDS sheets for specialty materials can fail an inspection. Keep a dedicated folder for material documentation separate from financial records. Scan labels before installation because many labels degrade or fall off over time.
Relying on memory instead of written logs always backfires. Three months into a barndominium build, nobody remembers exactly where every nail plate went or exactly how deep every footing got dug. The written log provides answers without argument.
Final Documentation for Certificate of Occupancy
The final inspection requires the most complete documentation package. Every inspection report from every phase needs to be present. Every signed-off permit card needs to be attached. Every third-party test report needs to be included. The final set of as-built drawings, marked up with any field changes, should match what actually got built.
Energy code compliance documentation often gets overlooked until the final inspection. Blower door test results, duct leakage tests, insulation certificates, and window U-factor ratings all need to be presented together. Barndominiums with large metal surfaces and open floor plans often struggle with air infiltration. Having the blower door test report shows whether the building actually meets the required air changes per hour.
Manufacturer installation instructions for specialty equipment like garage doors, ventilation fans, or backup generators should be in the final package. Inspectors want to verify that clearances, electrical disconnects, and safety features match the approved installation methods.
The certificate of occupancy gets issued only when every piece of documentation satisfies every code requirement. A single missing report or photograph can hold up the entire process for days or weeks. Professional builders treat documentation with the same seriousness as the physical construction because both matter equally to the final result.
Documentation as a Builder’s Best Tool
Good documentation does more than satisfy inspectors. It helps manage subcontractors, track progress, resolve disputes, and improve future builds. Every barndominium that gets built with thorough documentation teaches lessons that apply to the next project. The photos, logs, and reports become a reference library of what works and what needs improvement.
For owners acting as their own general contractors, documentation provides a learning curve. Each inspection phase reveals what information matters most to local code officials. By the time the final inspection arrives, the documentation process feels natural rather than burdensome. And that smooth final inspection, with an inspector nodding approval at an organized binder of proof, makes every minute spent documenting worthwhile.