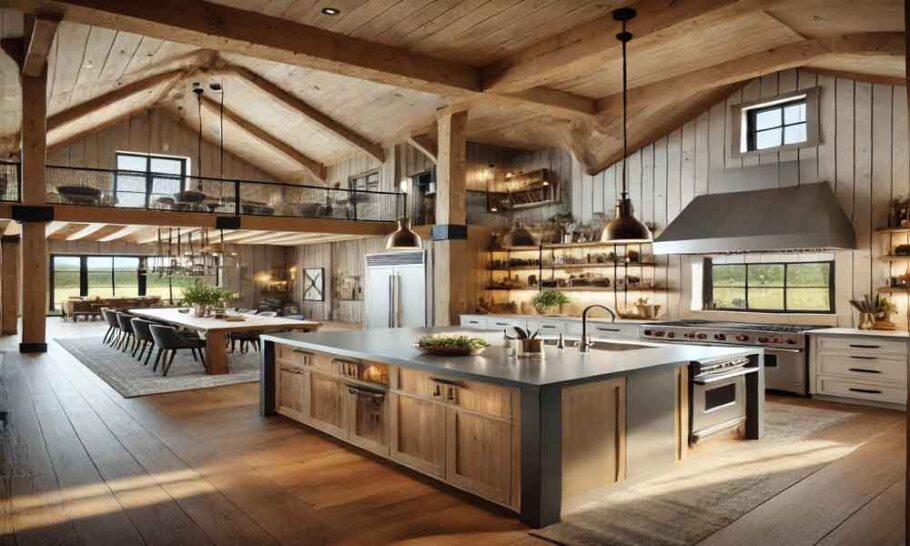
Barndominiums are known for their rustic charm, open spaces, and budget-conscious design potential. Whether you’re building your dream home from scratch or remodeling a barndo kitchen, one major expense to consider is the cabinetry. Kitchen cabinets can account for a significant chunk of your budget—unless you get creative with DIY options.
In this guide, we’ll walk you through everything you need to know about creating DIY barndominium kitchen cabinets, including affordable materials, design inspirations, and step-by-step strategies to achieve a custom look without spending a fortune.
Why Choose DIY Kitchen Cabinets for Your Barndominium?
DIY kitchen cabinets are not just a way to save money—they offer creative freedom, customization, and a chance to add authentic, handcrafted charm to your barndominium. Here’s why going DIY is worth considering:
- Cost-effective: Custom or pre-fabricated cabinets can easily run into thousands of dollars. With DIY, you can slash that cost significantly.
- Customization: Choose materials, finishes, and layouts that suit your style and kitchen space.
- Sustainability: Repurpose or upcycle old wood, doors, or furniture for eco-friendly solutions.
- Satisfaction: There’s nothing more rewarding than seeing a kitchen you built yourself in daily use.
Planning Your DIY Kitchen Cabinets
- Define Your Layout and Needs
Start by sketching your kitchen layout. Consider:
- How much storage do you need?
- What will go in each cabinet (e.g., dishes, pots, pantry items)?
- Do you need open shelving, closed cabinets, or a mix?
- What is your kitchen’s square footage?
Use free design tools like SketchUp, IKEA Home Planner, or even grid paper to plot out cabinet sizes and configurations.
- Measure Everything Carefully
Measure:
- Ceiling height
- Wall lengths
- Appliance sizes (stove, refrigerator, dishwasher)
- Plumbing and electrical locations
Accurate measurements ensure a good fit and minimize waste.
Budget-Friendly Materials for DIY Cabinets
Your choice of materials will have the biggest impact on your budget and aesthetics. Some popular options include:
- Plywood
- Pros: Strong, stable, affordable, easy to work with
- Best for: Cabinet boxes and shelves
- Tip: Choose cabinet-grade plywood for smoother finishes.
- MDF (Medium-Density Fiberboard)
- Pros: Smooth surface ideal for painting, cheaper than plywood
- Cons: Not as strong, can swell if exposed to moisture
- Best for: Cabinet doors or painted finishes
- Reclaimed Wood
- Pros: Eco-friendly, rustic aesthetic, often free or cheap
- Best for: Doors, open shelving, accents
- Tip: Sand and seal thoroughly to ensure longevity.
- Pallet Wood
- Pros: Free or inexpensive, rustic look
- Cons: Requires more labor (disassembly, sanding, treating)
- Best for: Accents, rustic cabinet faces, shelving
DIY Cabinet Construction: Step-by-Step
Here’s a simplified breakdown of how to build your own kitchen cabinets:
Step 1: Build the Cabinet Boxes
Materials: 3/4” plywood for sides, top, bottom, and back.
- Cut pieces to size using a circular saw or table saw.
- Use pocket screws and wood glue to join pieces together.
- Add braces for strength.
Step 2: Install Shelves
- Use shelf pins or cleats to support internal shelves.
- Measure carefully to ensure level placement.
Step 3: Attach Face Frames (Optional)
- Face frames give cabinets a more finished look.
- Build from 1×2 hardwood or pine boards.
- Attach with glue and brad nails.
Step 4: Build or Install Cabinet Doors
Options:
- Shaker-style doors: Made from MDF or plywood with simple frame.
- Flat panel doors: Easiest to build from one solid piece.
- Repurposed doors: Use doors from thrift stores or old furniture.
Add hinges and handles, and test swing direction before final installation.
Step 5: Sand and Paint or Stain
- Start with 120-grit sandpaper, finish with 220-grit.
- Apply wood filler where needed.
- Choose paint or stain that complements your barndominium style (more on that below!).
Step 6: Install Cabinets
- Start with upper cabinets first.
- Use a level and ledger board to keep them straight.
- Secure into wall studs with screws.
- Then install base cabinets, ensuring they’re level and flush.
Creative Ideas to Save Money and Add Style
- Use Open Shelving
Open shelves are trendy, affordable, and make your kitchen feel bigger. Great for displaying dishes, plants, and jars.
- Convert Furniture Into Cabinets
Use an old dresser, armoire, or desk as a unique base cabinet or pantry. Add a butcher block top for a rustic touch.
- Skip the Toe Kick
Raising your cabinets on legs (instead of a built-in toe kick) saves materials and adds character.
- DIY Concrete or Butcher Block Countertops
Pair your cabinets with budget-friendly counters. DIY concrete or butcher block counters can save thousands compared to quartz or granite.
- Repurpose Cabinet Doors
Old doors or shutters can become cabinet fronts. Salvage yards and auctions are great sources.
Paint & Finish Ideas for Barndominium Kitchen Cabinets
Barndominiums typically embrace rustic, industrial, or farmhouse vibes. Here are some style-forward finishes for your cabinets:
- White or Cream
Brightens up the space and works well with wood beams and open ceilings.
- Matte Black
Adds contrast in modern or industrial barndos. Pair with wood countertops for warmth.
- Two-Tone Cabinets
Use darker colors below and lighter ones above. This gives depth and visual interest.
- Natural Wood Finish
Let the grain shine through with a clear coat or light stain. Perfect for rustic or Western-style barndos.
- Distressed or Antiqued Paint
For a vintage farmhouse look, use chalk paint, sanding, and wax for a worn-in finish.
Final Thoughts
Building your own barndominium kitchen cabinets is a project that pays off in both savings and satisfaction. With basic tools, a bit of woodworking knowledge, and a vision for your space, you can create a kitchen that’s fully personalized, highly functional, and true to your barndo’s rustic roots.
From using plywood boxes and reclaimed wood doors to experimenting with paint finishes and unique layouts, the possibilities are endless when you’re the builder. So roll up your sleeves, grab your tools, and start building the heart of your home—the DIY way.
Bonus Tips for Success
- Always use quality hinges and drawer slides—cheap hardware can ruin even the best-built cabinets.
- Consider soft-close mechanisms for a modern feel.
- Don’t rush the finishing stage—good paint or stain can elevate basic materials.
- Label all your parts and cut lists before assembly to stay organized.