
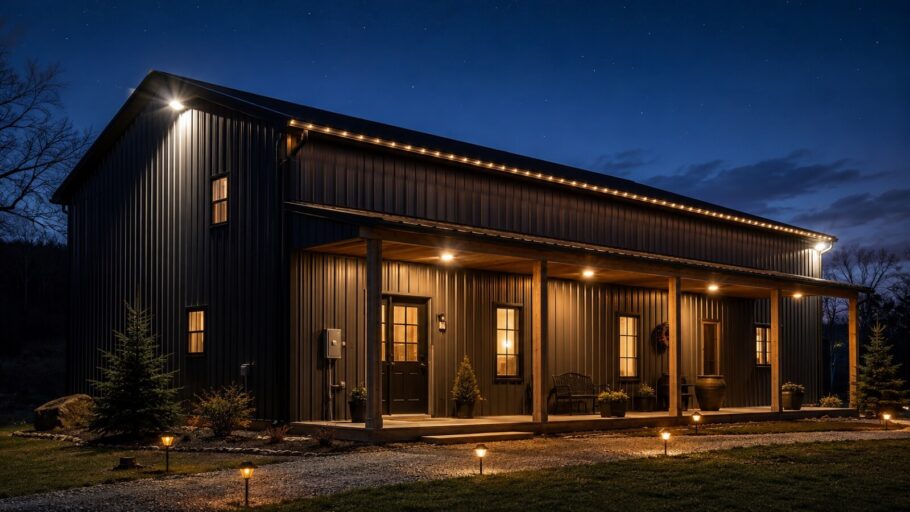
The steel has been erected, the slab is poured, and the framing is underway. For those embarking on the barndominium journey, the focus often shifts to insulation, interior layouts, and the grand reveal of the living space. However, there is a critical phase that occurs before the drywall goes up and the siding goes on—a phase that determines whether the finished home feels like a cozy retreat or a dark, inconvenient warehouse.
That phase is the exterior electrical rough-in.
Because barndominiums often feature large overhangs, metal siding, and expansive open spaces, the rules for exterior electrical planning differ from traditional stick-built homes. Once the spray foam is applied and the metal panels are screwed into place, adding a circuit becomes an invasive and costly operation. Proper planning at the blueprint stage is the only way to ensure a seamless blend of ambiance, security, and functionality.
The Challenges of the Metal Shell
Before mapping out outlets and fixtures, it is vital to understand the unique substrate. Barndominiums typically utilize metal siding or a metal building frame. Unlike wood, which is forgiving and easy to drill through after the fact, metal requires forethought. Penetrations must be sealed perfectly to prevent water intrusion and rust, and running conduit or Romex through steel girts and purlins requires specific planning to ensure the wiring is protected from sharp edges and the elements.
Furthermore, the deep overhangs characteristic of barn architecture create zones of deep shade. While this is excellent for energy efficiency and protecting outdoor living areas, it creates “cave-like” conditions near the walls. The lighting plan must compensate for this natural darkness without creating harsh glare.
Planning for Ambiance: The Art of Layering
Ambiance in a barndominium exterior design is not about floodlights. It is about layering light to create depth, texture, and warmth. A single fixture by the door will not suffice for a structure of this scale.
- Soffit and Eaves Lighting: The expansive soffits are prime real estate for recessed lighting. LED can lights placed at regular intervals along the perimeter serve as the primary wash for walkways. For a more modern farmhouse aesthetic, consider dark sky-compliant fixtures that direct light downward, preventing light pollution and highlighting the landscaping rather than blinding the neighbors.
- Architectural Highlighting: Barndominiums often feature distinct architectural elements—a towering gable, stone wainscoting, or timber columns. Uplighting placed at the base of these features or wall-wash lights mounted on the siding can turn a simple building into a striking nighttime focal point.
- Deck and Patio Zones: The goal here is usability. String lights are popular, but they need a power source. Planning for ceiling fans with integrated lights on porches and dedicated circuits for grilling stations ensures the outdoor living space functions as an extension of the home.
The Security Imperative: Strategic Illumination
While ambiance sets the mood, security provides peace of mind. A barndominium often sits on acreage or in rural settings where ambient street lighting is non-existent. This isolation makes strategic lighting non-negotiable.
Security lighting should be motion-activated but layered. Instead of one massive floodlight that startles the homeowner and creates harsh shadows, consider a multi-point approach.
- Corner Coverage: Motion sensors placed at the four corners of the structure ensure that anyone approaching the perimeter triggers a response.
- Entry Points: All man-doors, overhead garage doors, and shop entries need dedicated, dusk-to-dawn lighting. These should be bright enough to identify faces but shielded to prevent glare.
- Driveway and Approach: For long driveways, bollard lights or post-top lanterns spaced intermittently provide a safe path of travel while deterring trespassers. These should be wired to a switch inside the home for manual control, alongside photocell sensors for automatic operation.
The Holiday Light Dilemma: Outlets in the Eaves
Perhaps the most overlooked aspect of exterior planning is the holiday lighting strategy. For many, decorating the barndominium is a source of pride, but running extension cords up ladders and across walkways is a hazard. The solution is a dedicated holiday lighting system.
During the rough-in phase, specify switched outlets located in the eaves or soffits. These should be placed at the peak of the roofline, on the corners, and above windows. These outlets should be controlled by a single switch inside the home—preferably in the garage or a utility room—or tied to a smart home system for scheduled activation.
Because barndominium roofs are often high and steep, these outlets should be installed by the electrician while scaffolding is still present. This eliminates the need for dangerous ladder work in freezing temperatures later on.
Outlet Placement: Beyond the Standard Code
Standard building codes dictate a minimum number of exterior outlets, typically one in the front and one in the back. For a barndominium lifestyle, this is insufficient.
Consider the sheer amount of exterior maintenance and recreation that occurs around a barndominium. There are pressure washers for the concrete, weed eaters for the perimeter, and potentially RVs or trailers that need power.
- The “Maintenance” Circuit: Place GFCI outlets at strategic intervals—roughly every 20 to 30 feet—along the exterior walls. This ensures that a pressure washer or power tool can reach any section of the home without daisy-chaining extension cords.
- The “Leisure” Circuit: Outdoor kitchens, hot tubs, and fire pit areas require dedicated 20-amp circuits, and sometimes 240-volt lines if a hot tub or sauna is planned.
- The Shop/Workshop: If the barndominium includes a shop, the exterior outlets near the shop doors should be on a separate circuit from the living quarters to prevent tripping breakers when a welder or air compressor kicks on.
Smart Home Integration
Modern barndominiums are often high-tech. Roughing in for smart switches and lighting control is easier during the build than retrofitting later. Wiring for smart dimmers on exterior lights allows for scene setting—”Party Mode” might be bright and festive, while “Movie Night” on the patio might be dim and warm.
Furthermore, if the home features a metal roof or extensive metal siding, Wi-Fi signals can struggle to penetrate. Ensure that any smart exterior switches have a strong connection to the main hub, or consider hardwiring the control system.
The Final Walkthrough
Before the insulation truck arrives, walk the perimeter with the electrician and the builder. Visualize the Christmas tree in the corner of the porch. Picture the grill in the outdoor kitchen. Imagine the security needed for a dark winter night.
Marking the locations for cans, floodlights, and outlets with spray paint on the framing or sheathing provides a final visual check. It is far easier to move a painted mark on wood than to cut a hole in a finished metal wall.
The rough-in phase is the silent guardian of the barndominium’s future. It is the moment where utility meets aesthetics. By planning for the holiday glow, the security beacon, and the everyday convenience, the structure transforms from a mere building into a functioning, welcoming home.