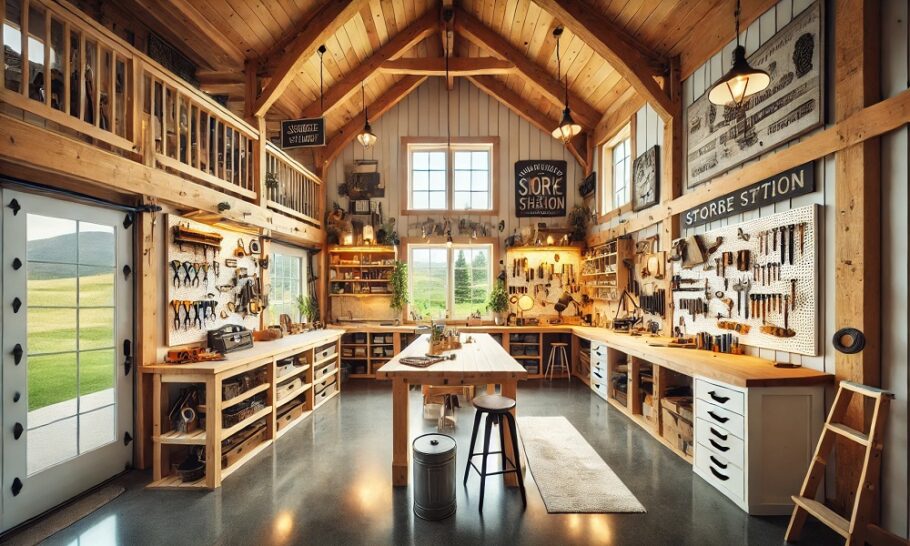
Barndominiums are incredibly versatile structures, offering ample space and flexibility to accommodate both living and working areas. For hobbyists, they provide the perfect opportunity to design dedicated spaces for woodworking, crafting, art, or any passion project. Whether you’re a weekend DIYer or a full-time artist, here are tips on how to create a functional workshop or studio in your barndominium.
1. Define Your Hobby Needs
Before diving into design, consider the specific requirements of your hobby. Ask yourself the following questions:
- What equipment or tools do I use? Large woodworking machinery, easels, or sewing machines will dictate the amount of space needed.
- Do I need a clean or controlled environment? For activities like painting or electronics, dust control and ventilation are essential.
- How much storage do I need? Assess the materials you use, from lumber to paints or fabrics, to determine storage needs.
- Will I host others in this space? If you plan to teach classes or collaborate, you’ll need extra space and seating.
2. Choose the Right Location
Deciding where to place your workshop or studio within your barndominium is crucial for functionality and comfort. Here are some considerations:
- Separate Entrance: A separate entrance to the workshop can keep workspaces private and reduce traffic through living areas.
- Proximity to Utilities: Ensure easy access to electrical outlets, plumbing, and HVAC systems. Workshops often require more power outlets or specialized lighting.
- Noise Control: Place noisy areas, like woodworking shops, away from bedrooms or living rooms.
- Natural Light: Studios for art or crafting benefit greatly from natural light. Large windows or skylights can improve visibility and create an inspiring environment.
3. Plan the Layout for Efficiency
A well-organized layout can make or break your productivity. Use these tips to design a functional space:
- Work Zones: Divide the space into zones based on tasks. For example, a woodworking shop might have areas for cutting, assembly, and finishing, while an art studio might include zones for painting, drying, and storage.
- Ergonomics: Ensure workbenches, desks, and chairs are at comfortable heights to reduce strain.
- Clear Pathways: Maintain open pathways to move freely between zones, especially if you’re handling large tools or materials.
- Workflow Considerations: Place frequently used tools and materials within easy reach. A “U-shaped” or “L-shaped” workspace can help you access everything efficiently.
4. Maximize Storage Solutions
Ample storage keeps your workshop or studio organized and clutter-free. Here are some ideas:
- Custom Shelving: Build shelves to fit your tools and materials. Adjustable shelves offer flexibility as your needs change.
- Pegboards: Perfect for hanging tools, pegboards keep your workspace tidy while providing easy access.
- Cabinets and Drawers: Store smaller items like paint tubes, screws, or sewing notions in labeled cabinets and drawers.
- Mobile Storage: Use rolling carts or toolboxes to move supplies where you need them.
- Overhead Storage: Utilize ceiling space to store less frequently used items, like seasonal materials.
5. Ensure Adequate Lighting and Ventilation
Workshops and studios often require specialized lighting and ventilation:
- Task Lighting: Install bright, focused lighting above work areas to prevent eye strain. LED strip lights or under-cabinet lighting work well.
- Ambient Lighting: Overhead fixtures ensure the space is evenly lit.
- Natural Ventilation: Open windows and doors allow fresh air in and help dissipate fumes from paint, glue, or machinery.
- Exhaust Fans: For woodworking, welding, or painting, install exhaust fans to remove dust and odors.
6. Incorporate Safety Features
Safety is critical when designing a workspace, especially if you’re using power tools or hazardous materials. Consider these precautions:
- Fire Safety: Install fire extinguishers and smoke detectors. Use fire-resistant materials for workbenches and walls.
- Proper Wiring: Hire a licensed electrician to install outlets and circuits that can handle the load of your tools and equipment.
- First Aid Kit: Keep a well-stocked first aid kit within easy reach.
- Flooring: Choose non-slip, easy-to-clean flooring like epoxy-coated concrete or rubber mats.
7. Personalize Your Space
While functionality is key, your workshop or studio should also inspire creativity and reflect your personality. Here’s how to add your personal touch:
- Decorative Elements: Hang artwork, motivational quotes, or hobby-related decor.
- Comfort Features: Include a cozy chair, a small fridge for snacks, or a sound system for music.
- Color Scheme: Use colors that energize or relax you, depending on your workflow.
8. Budgeting and Practical Tips
Creating a workshop or studio doesn’t have to break the bank. Keep costs down with these tips:
- Start Small: Begin with essential tools and storage solutions, then expand as needed.
- DIY Projects: Build your own shelves, workbenches, or organizers to save money.
- Repurpose Materials: Use reclaimed wood or second-hand furniture for storage and work surfaces.
- Plan for Growth: Design the space with flexibility in mind, so it can evolve with your hobbies.
Conclusion
Designing a barndominium workshop or studio is an exciting opportunity to create a space tailored to your hobbies and passions. By planning carefully, prioritizing functionality, and adding personal touches, you can build a space that’s both inspiring and practical. Whether it’s for woodworking, crafting, or painting, your barndominium can become the ultimate haven for creativity and productivity.

