The barndominium has come a long way from its humble origins as a simple metal workshop with a living space tacked on the side. Today’s barndos push architectural boundaries, and few design features make a statement quite like a cantilevered wing. Picture a master bedroom hovering fifteen feet above a patio, or a home office that seems to float over the surrounding landscape with nothing visible holding it up. That drama doesn’t happen by accident. It requires serious engineering chops, and post-tensioned beams have become the secret weapon for making these dramatic overhangs both safe and stunning.
Why Cantilevered Wings Transform Barndominium Design
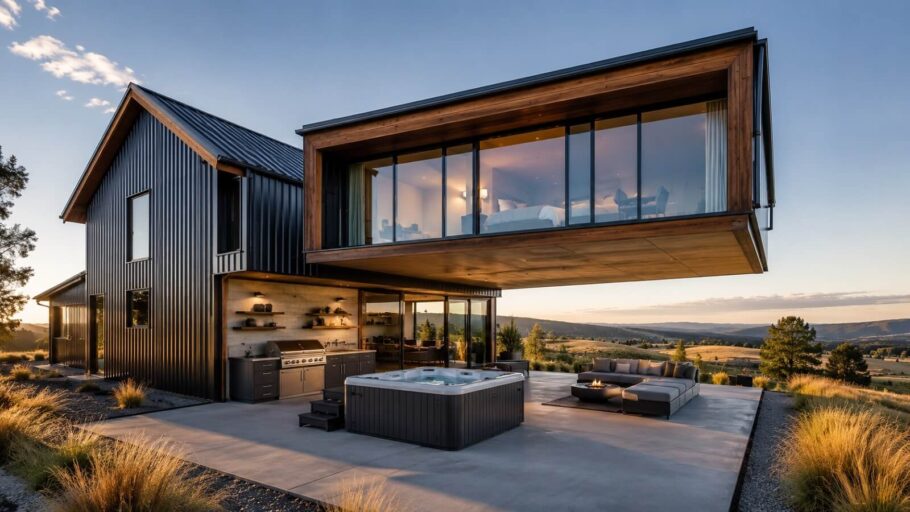
Most barndominiums stick to straightforward rectangular footprints. That boxy simplicity keeps costs down and construction straightforward, but it also leaves a lot of potential on the table. A cantilevered wing breaks that mold entirely. By extending a portion of the second floor beyond the exterior wall below, the building gains a sense of motion and lightness that feels almost impossible for a structure typically built from red iron and wood framing.
These overhangs serve practical purposes too. A bedroom that jets out twelve feet creates covered outdoor space beneath it—perfect for a grilling station, hot tub, or morning coffee spot that stays dry when the rain rolls across the plains. The shade from an extended upper floor can drop temperatures on a south-facing patio by ten degrees or more. And that office overlooking the back pasture? The cantilever puts the windows right where the views open up, not set back behind a wall and a roof eave.
The Structural Reality Check
Before getting carried away with renderings of floating glass boxes, a hard look at physics is necessary. Cantilevers fight gravity in the most demanding way possible. Every square foot of that overhanging floor wants to tip the entire structure forward like a seesaw with a heavy kid on one end. The connection between the wing and the main building has to resist enormous rotational forces—what engineers call moment.
Traditional reinforced concrete handles moment reasonably well up to a point. Steel rebar embedded in a concrete beam stretches and takes tension on the bottom side of the cantilever. But there’s a catch. Concrete naturally cracks under tension. Those hairline fractures might not cause immediate failure, but they let moisture seep in, corrode the rebar, and slowly degrade the beam’s capacity. For a long cantilever holding up a bedroom, that slow degradation becomes a real concern over thirty or forty years. The beam also has to stay thick enough to avoid sagging, and thick beams eat up headroom or force the whole floor system deeper than most designs want.
Post-Tensioned Beams Enter the Picture
Post-tensioning solves problems that ordinary rebar cannot touch. The concept sounds almost too clever to work, but it has decades of proven performance in parking garages, bridges, and high-rise buildings. Instead of laying passive steel bars inside a concrete form and hoping they bond well enough, post-tensioning uses high-strength steel tendons—bundles of seven wires twisted together—that get stretched like rubber bands after the concrete has cured.
Those tendons run through plastic ducts embedded in the beam. Once the concrete reaches sufficient strength, a hydraulic jack pulls each tendon to roughly 33,000 pounds of force. Then the tendon gets locked off against a steel anchor plate embedded at the end of the beam. That tension puts the entire concrete beam into compression. Remember how concrete cracks under tension? Squeeze it hard enough from the ends, and those tension forces that would normally crack the bottom of a cantilever get cancelled out by the pre-compression.
The result is a beam that can handle much longer spans and overhangs with less depth. A conventional reinforced concrete beam for a twelve-foot cantilever might need to be twenty-four inches deep. A post-tensioned beam doing the same job might drop to sixteen inches, saving eight inches of floor-to-ceiling height below or allowing a sleeker profile. Even better, post-tensioned beams stay tight. No sagging over time. No cracks inviting moisture and corrosion. Just a solid, predictable structure that performs for decades.
Designing the Overhang for Real-World Loads
Engineering a cantilevered barndominium wing starts with honest load calculations. Dead loads come first—the weight of the concrete slab or deck, the flooring finish, framing, insulation, drywall, and anything else permanently attached. Live loads follow, typically forty pounds per square foot for residential sleeping areas, but that can jump to fifty or sixty for an office with filing cabinets and bookshelves. Then there’s the environmental stuff. Wind uplift on the overhang can be vicious, especially in open country where barndominiums often sit. Snow loads matter for northern climates, and a drifting pattern around the wing can pile up more weight than a standard ground snow load suggests.
The critical number in any cantilever design is the backspan ratio. Good practice dictates that the portion of the beam extending back into the main structure should be at least twice the length of the cantilevered portion. A ten-foot overhang needs twenty feet of beam buried inside the building, anchored into the floor system and connected to the frame. Some aggressive designs push to a 1:1 ratio with careful engineering and massive counterweights, but that drives costs up fast.
Post-tensioned beams shine here because the compression they carry doesn’t rely as heavily on the backspan length. The tendons run continuously from the far end of the backspan all the way to the tip of the cantilever. When the jack pulls the tendon, it compresses the entire beam uniformly. That means even a relatively short backspan can work, provided the connection to the rest of the structure can handle the uplift at the back end of the beam.
Connecting the Wing to the Rest of the Barndominium
A floating bedroom needs more than a beam. The connection details make or break the whole assembly. Most barndominiums use a steel moment frame at the cantilever location—essentially a rigid portal frame that resists rotation without needing diagonal bracing. The post-tensioned concrete beams bear on top of or alongside these steel columns, with welded shear studs or embedded plates transferring forces between the concrete and steel.
Getting this connection right requires close coordination between the concrete crew and the ironworkers. The anchorages for the post-tensioning tendons have to align perfectly with the steel frame below. Any misalignment means the tendons cannot tension properly, and untensioned tendons are just expensive rebar. Field measurements need verification multiple times before concrete pours.
The foundation beneath the cantilever wing also has to handle the moment. A standard slab-on-grade will not cut it. The column supporting the cantilever transfers not just downward weight but a significant rotational force into the footing. That calls for deep grade beams, oversized piers, or a continuous mat foundation that distributes the moment across a large area. In some designs, the backspan beams themselves act as counterweights, eliminating the need for a massive footing at the overhang’s supporting column.
Construction Steps for a Post-Tensioned Cantilever
Pouring a post-tensioned beam for a barndominium wing follows a specific sequence that differs from ordinary concrete work. First comes the formwork, built accurately to the beam dimensions with enough bracing to handle the weight of wet concrete and the later tensioning forces. The plastic ducts for the tendons get placed inside the forms, supported on small chairs or rebar supports to hold them at the correct height. Anchorage hardware bolts to the formwork at each end.
Reinforcing steel goes in next—ordinary rebar around the ducts to handle local stresses and prevent splitting at the anchorages. Then the concrete gets placed, vibrated thoroughly to eliminate voids around the ducts. Air pockets next to a tendon are dangerous. They create stress concentrations that can crack the beam when tensioning begins.
After the concrete cures to about 75% of its design strength—usually three to five days depending on mix design and temperature—the tensioning starts. A hydraulic pump connected to a center-hole ram pulls each tendon to the specified force while a pressure gauge and a measured elongation confirm the correct tension. Once the ram holds the tendon at full stretch, a wedge bites into the tendon and seats into the anchor. The ram releases pressure, and the wedge holds everything in place. Any excess tendon gets cut off, and a final grout injection fills the ducts to bond the tendon to the concrete and prevent corrosion.
The whole process demands attention to safety. Those tendons store tremendous energy. Cutting a tensioned tendon without proper precautions can send the severed end flying with enough force to kill someone. This is not a DIY job. Licensed post-tensioning subcontractors handle the work with specialized equipment and training.
Where These Designs Make the Most Sense
A cantilevered wing with post-tensioned beams adds significant cost to a barndominium project. The engineering fees run higher. The materials cost more—high-strength tendons, specialty anchors, and grout pumps all add up. The labor requires skilled crews who understand post-tensioning. So where does the expense justify itself?
Sites with spectacular views make the best candidates. A cantilever pushes the bedroom or office right to the edge of a hillside, a creek, or an open meadow. The feeling of sitting in a room that has no visible support below creates an almost magical connection to the landscape. Urban infill barndominiums on small lots also benefit from cantilevers. Extending the upper floor over a driveway or a setback allows a larger footprint without violating zoning restrictions on ground coverage.
Hot climates offer another compelling reason. The shade from an overhanging bedroom can keep a west-facing patio usable through the afternoon. That passive cooling reduces energy bills and makes outdoor living spaces comfortable for more hours of the day. Cold climates flip the equation—a cantilever without proper thermal breaks becomes a massive heat sink. Insulating the underside of the wing and detailing the connection to avoid thermal bridging requires extra attention, but it can be done successfully with rigid foam and thermal spacers.
Practical Limits and Warning Signs
No matter how clever the engineering, physics sets hard limits on cantilever designs. A residential barndominium rarely sees overhangs beyond fifteen or sixteen feet. Beyond that point, the beam depth needed to resist deflection becomes impractical, and the forces transferred back into the main structure grow enormous. For reference, the famous Fallingwater house has cantilevers around fifteen feet, and those have deflected noticeably over the decades despite being engineering marvels for their time.
Signs of trouble in an existing cantilevered floor include cracks near the supporting wall that grow wider over time, doors that start sticking seasonally, or a visible sag measured with a long straightedge. Post-tensioned beams resist these problems better than conventional reinforcement, but they are not immune. A beam that loses its post-tensioning due to tendon corrosion or anchorage failure behaves like an under-reinforced conventional beam. Cracks open, deflections increase, and eventually the concrete crushes at the support.
Regular inspections matter. Every few years, a look at the underside of the cantilevered floor for cracks, spalling concrete, or rust stains tells a story about the structure’s health. Tension tendons can be checked for slack if access to the anchorages exists, though most residential installations cover the anchorages with drywall or stucco.
The Bottom Line on Dramatic Overhangs
Cantilevered wings turn a standard barndominium into something memorable. The design challenges are real, and the consequences of getting them wrong are severe. But post-tensioned beams offer a proven, reliable way to create those dramatic overhangs without the thick, cracking-prone beams that ordinary reinforcement would demand. The look of a bedroom floating in space, the shaded patio beneath, the sense that the building defies gravity—all of that comes down to carefully engineered tension pulling against carefully poured concrete. For anyone willing to invest in the engineering and skilled labor, those dramatic overhangs deliver a payoff that no square box ever could.