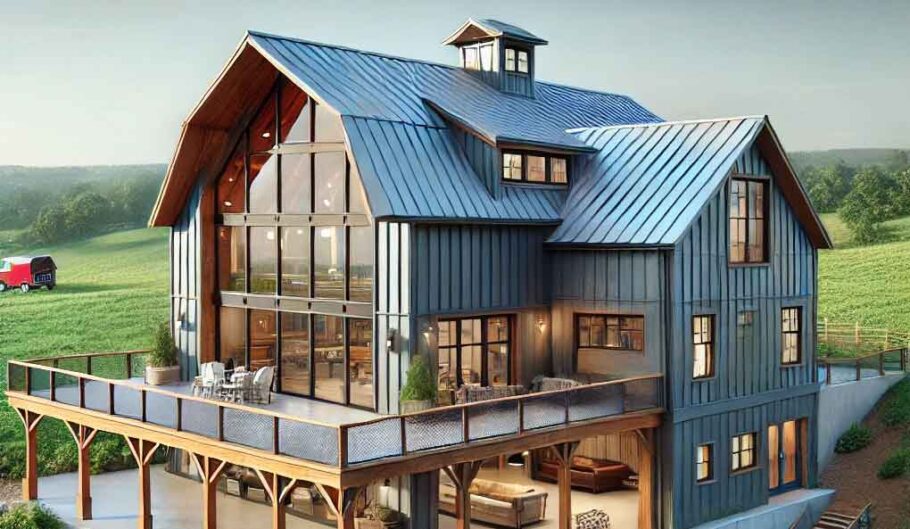
The barndominium craze isn’t going anywhere. And for good reason. These metal building homes offer wide-open floor plans, durability against pests and fire, and often a lower cost per square foot than stick-framed construction. But here’s the dirty secret that many barndominium owners learn the hard way: most metal buildings are designed for agricultural storage, not comfortable human habitation. The insulation systems that work for a hay barn can ruin a home.
Condensation dripping from purlins. Rust forming around screw fasteners. Musty smells inside closets and along exterior walls. Mold blooming behind interior finishes. These problems plague countless barndominiums, and they all trace back to one fundamental mistake—treating a metal building like a typical house and insulating from the inside out.
The better path has been around for decades in commercial construction and cold climates. Building scientists call it the “Perfect Wall.” Applying it to a metal building flips conventional thinking upside down, literally working from the exterior cladding inward. Done right, this approach stops moisture problems before they start, eliminates thermal bridging, and creates a barndominium that stays dry, comfortable, and rot-free for decades.
Why Traditional Metal Building Insulation Fails for Living Spaces
Standard metal building insulation consists of fiberglass batts laminated to a vinyl or foil facing, sandwiched between the steel siding and the structural girts. On paper, this looks fine. The insulation fills the cavity, and the facing acts as a vapor retarder. In reality, it fails for three reasons.
First, the steel framing never gets warm. In cold weather, heat travels right through the fiberglass and hits the cold metal girts and purlins. That creates a thermal bridge—a direct path for heat to escape and for interior moisture to find a cold surface. Warm, humid indoor air drifts toward those cold steel members, and condensation forms like sweat on a glass of iced tea. Behind drywall or plywood, that moisture has nowhere to go.
Second, the vinyl facing is never truly sealed. Overlapping seams, penetrations for electrical boxes, and gaps around windows all allow humid interior air to bypass the vapor retarder. Once that air reaches the back side of the cold metal siding, condensation happens inside the insulation itself. Wet fiberglass has nearly zero insulating value and becomes a perfect breeding ground for mold.
Third, metal buildings move and breathe differently than wood frames. Steel expands and contracts with temperature changes, which cracks rigid insulation and loosens fasteners over time. The standard single-layer approach cannot accommodate that movement without developing leaks and air gaps.
None of this matters much for a machine shed or a hay loft. But human beings produce enormous amounts of moisture—cooking, showering, breathing, houseplants, laundry. That moisture has to be managed, not just blocked.
The Perfect Wall Concept Explained Simply
Building scientist Dr. Joseph Lstiburek developed the Perfect Wall concept to solve exactly these problems. The core idea is almost painfully simple: put all the control layers—rain screen, air barrier, thermal insulation, and vapor control—on the outside of the structural frame.
Think of a person wearing a jacket. The body (steel frame) stays warm because the insulation (jacket) wraps around the outside. The jacket also blocks wind and sheds rain. What matters is that the insulation layer sits outside the load-bearing structure. In a traditional wall, insulation sits between the studs or girts, which means the framing itself never gets protected from the cold or heat.
In a Perfect Wall assembly, the structural frame exists entirely inside the conditioned space. The temperature of that steel never drops to outdoor levels because insulation wraps around the exterior. No cold steel, no condensation. No condensation, no mold or rust.
This approach also separates each control layer so they can do their jobs without interfering with one another. The clashing requirements that cause failures in conventional walls—needing a wall to drain, dry, insulate, and stop air all at once—disappear when each layer has a dedicated position in the stack-up.
Translating the Perfect Wall to a Metal Building Frame
Applying this to a barndominium requires rethinking the order of construction. Typical metal building erection goes like this: set the steel columns and rafters, attach girts and purlins, then hang insulation and siding. That puts the insulation inside the steel.
The Perfect Wall version reverses the sequence. After the steel frame stands, the next step is attaching a continuous layer of rigid insulation outside the girts and purlins. Then comes the weather barrier, then furring strips to create a rainscreen gap, and finally the metal siding. The steel frame ends up buried behind insulation, protected from outdoor temperatures.
Here is the layer-by-layer breakdown from outside to inside, suitable for most climate zones:
Outer cladding – Standard ribbed metal panels or standing seam roofing and siding. This layer sheds bulk water and resists impact. It attaches through the rainscreen gap into the framing below.
Rainscreen gap – One-by-three or one-by-four furring straps running vertically (or horizontally on walls) create a one-inch air gap behind the metal cladding. This gap serves two critical functions. It allows any water that gets past the siding to drain out the bottom. And it creates a convective air current that dries the back side of the cladding and the outer surface of the insulation. This gap alone prevents the vast majority of moisture accumulation problems seen in sealed, unvented metal building walls.
Continuous rigid insulation – This is the thermal and vapor control heart of the assembly. Four to six inches of polyisocyanurate or mineral wool rigid board installs directly over the steel girts and purlins, with staggered seams to minimize air leakage. Polyiso offers high R-value per inch (around R-6) and low vapor permeability—a good choice for most climates. Mineral wool performs better in fire resistance and allows some vapor drying, making it preferable for mixed-humid or hot-humid zones. The key requirement is continuity: no gaps at floor lines, corners, or around openings.
Air and water control membrane – A fluid-applied or peel-and-stick membrane covers the outside face of the rigid insulation. This layer stops bulk water that somehow bypasses the siding and rainscreen, and it stops air movement through insulation joints. In a Perfect Wall, this membrane sits on the warm side of the insulation relative to outdoors? Actually, careful—with continuous exterior insulation, the dew point shifts. The membrane should be vapor-permeable enough to allow outward drying if any moisture gets trapped. Self-adhered modified bitumen or fluid-applications like Prosoco R-Guard work well.
Steel girts and framing – The structural frame now lives inside the control layers. The steel stays at roughly the same temperature as the interior space because insulation wraps around the outside. This eliminates condensation risk entirely.
Cavity insulation (optional) – Between the steel girts, additional insulation can be added for increased R-value. Fiberglass batts, rock wool, or even spray foam fill the cavity, but note that this insulation is strictly bonus. The primary thermal barrier already exists on the outside. Unlike conventional walls, this cavity insulation never contacts cold steel, so condensation cannot form inside the wall.
Interior vapor retarder – For most climates, a smart vapor retarder like CertainTeed MemBrain or Intello Plus works best on the interior side of the girts, behind the drywall. These products remain vapor-open during drying conditions but close up when humidity rises. In very cold climates (north of Zone 5), a polyethylene vapor barrier directly behind the drywall may be appropriate, but only if the exterior insulation is thick enough to keep the condensing surface above the dew point.
Interior finish – Standard drywall, plywood, or OSB. Nothing special needed here because moisture never reaches this depth.
Climate Zone Considerations That Change the Recipe
The Perfect Wall assembly is not a one-size-fits-all prescription. Climate zones dictate two critical adjustments: the thickness of exterior insulation and the vapor permeability of certain layers.
In cold climates (Zones 5, 6, 7, and Marine 4), the exterior rigid insulation must be thick enough to keep the dew point inside that insulation layer, not within the wall cavity or on the steel framing. A general rule from building science: in a steel building, the exterior continuous insulation should provide at least fifty percent of the total wall R-value. For an R-30 wall, that means at least R-15 on the outside. In practice, that translates to three to four inches of polyiso or mineral wool. Skimping here guarantees condensation inside the steel cavity.
In hot-humid climates (Zones 1, 2, and the humid parts of 3 and 4), the moisture drive comes from outside in during summer. Air conditioning creates a cool interior surface, and humid outdoor air wants to condense on that chilled drywall. The fix is to ensure the vapor control strategy blocks outside vapor. Exterior insulation still works, but the membrane on the outer face of the rigid board should be vapor-impermeable. Foil-faced polyiso already provides this. A separate vapor barrier behind the siding becomes unnecessary.
Hot-dry climates (Zones 2B and 3B) have far fewer moisture problems. The main concern becomes air leakage bringing dust and occasional summer humidity. A simplified Perfect Wall with exterior mineral wool and a high-quality air barrier works beautifully without heavy vapor control.
Mixed climates (Zones 3 and 4, not marine) need balanced assembly that can handle both winter and summer moisture drives. Smart vapor retarders on the interior are essential here. Fixed-position vapor barriers (polyethylene on the inside or vinyl on the outside) cause trouble by trapping moisture from the opposite season.
The Money Question: Is It Worth the Extra Cost?
Honest answer—a Perfect Wall barndominium costs more upfront than the standard insulation-between-girts approach. The rigid insulation alone adds several dollars per square foot. The furring strips and rainscreen add labor. The details around windows, doors, and corners require careful planning and more expensive flashing products.
But comparing upfront costs misses the point. A standard metal building home with interior insulation will need repairs within ten years in most climates. Rusted fasteners, moldy drywall, rotting OSB sheathing, and compressed fiberglass with zero R-value are not hypothetical problems. They are the expected outcome. The Perfect Wall eliminates these failures entirely.
The energy savings also add up. Continuous exterior insulation eliminates thermal bridging through steel girts, which can account for fifteen to thirty percent of heat loss in standard metal building walls. The heating and cooling bills drop measurably. In a well-executed Perfect Wall, the barndominium performs closer to a high-end passive house than a pole barn.
Getting the Details Right Where Most Builders Screw Up
Three details determine success or failure more than any other.
Windows and doors need to mount in the same plane as the exterior insulation, not flush with the steel girts. That means building out bucks or using extended flange windows. The rough opening gets wrapped with the air barrier, then the window installs over that, with the rainscreen draining out past the window flange. This detail costs time but prevents the single biggest leak point in metal buildings.
The transition from wall to roof requires continuous insulation across the eave. Too many builders stop the wall insulation at the top girt and start roof insulation above, leaving a cold steel channel right at the eave. A thermal break at this corner is non-negotiable—otherwise condensation runs down the inside of the wall like a leaky gutter.
Penetrations for electrical, plumbing, and exhaust vents need sealed boots or sleeves that maintain both the air barrier and the insulation continuity. Drilling a hole through the rigid insulation and calling it done creates a thermal bypass and an air leak. Every penetration deserves a purpose-made seal.
Why This Approach Works Where Others Fail
Metal buildings are not the problem. The problem is treating them like wood-framed houses. Wood breathes, absorbs moisture, and has some thermal resistance of its own. Steel conducts heat brilliantly and corrodes when wet. The same wall assembly cannot serve both materials.
The Perfect Wall accepts steel for what it is—a strong, durable structural material with terrible thermal properties. By wrapping insulation around the outside, the steel stops being a thermal liability. It becomes just another part of the interior space, kept warm or cool by the continuous blanket outside.
For anyone planning a barndominium, this design should not be optional. Budget for the exterior insulation. Learn the rainscreen detail. Hire a builder who understands building science, not just steel erection. The difference between a barndominium that feels fresh and dry after fifteen years and one that smells like a damp basement after five is the order of those layers—outside in, not inside out.